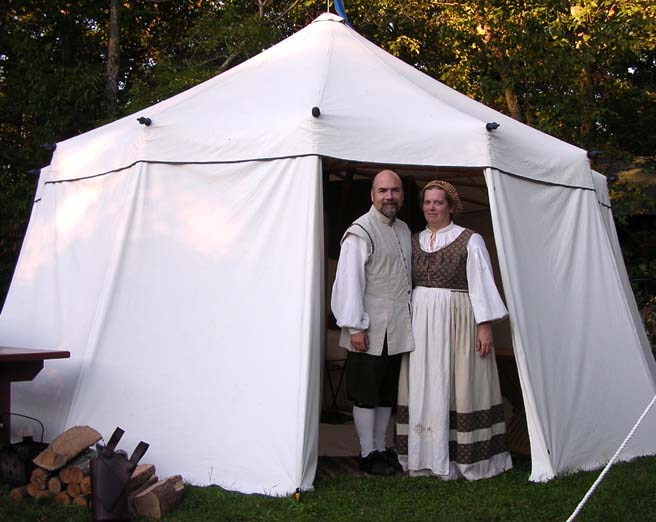
 The Taj Pavilion at Harper's Retreat VIII |
|
The Taj Pavilion at Harper's Retreat VIII |
There is a joy to camping with the SCA which comes from immersing oneself into the Medieval persona of one's own creation. After several wondrous years with the Society for Creative Anachronism we found that our own nylon tent had become an unwelcomed reminder of the mundane world, and we were eager to graduate into something more authentic. The resulting quest led to the construction of a 20' pavilion which was as inexpensive and as simple in design as we, two frugal engineers, could hope to make it.
Our "Taj Pavilion" looks and works as a Medieval pavilion. We are delighted with our new tent, and have spent many sunny days and stormy nights in its spacious comfort. Had we known how easily it could be made, we would have built it years ago. For those who also wish to make their own pavilion, but perhaps have held off out of concern over the difficulties or costs of such an undertaking, we proudly present:
Several excellent pamphlets and websites are already available which cover the design and construction of pavilions, and many gorgeous tents have been made by following their directions. We found however (did we mention that we're both engineers?), that all of these designs included some very time-consuming or complex features, and some required the use of an industrial sewing machine or other special equipment. While we were about the task of "designing out" all of these features, we also planned a simple process for building and setting up our pavilion with a minimum of effort. We cut all the corners we thought were reasonable without loosing sight of our original goal of creating a convincing pavilion.
These are the details that
make the Easy, No-bake Pavilion work:
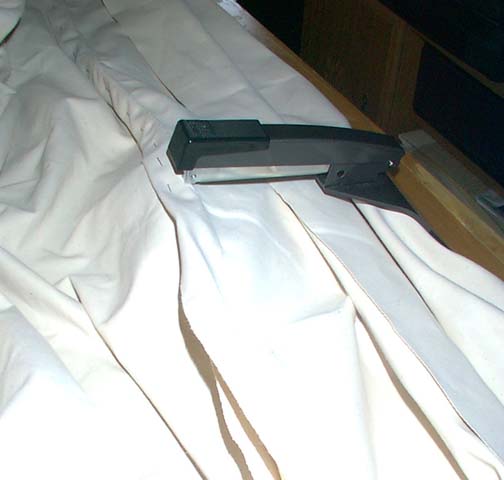
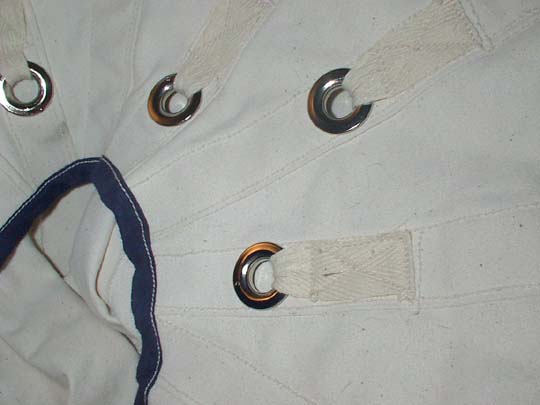 These grommets are at the peak of the roof |
 The strap runs through the grommet, and away from the nearest edge |
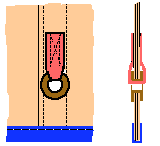
| Why it works: A tent can be big, strong and light if its structural stresses can be focused to where the tent is strongest: the seams. Since most of the stress in the fabric of a tent is in the form of tension running from ground to peak, we run the seams in that direction and hold all the fabric in place from the ends of the seams. |
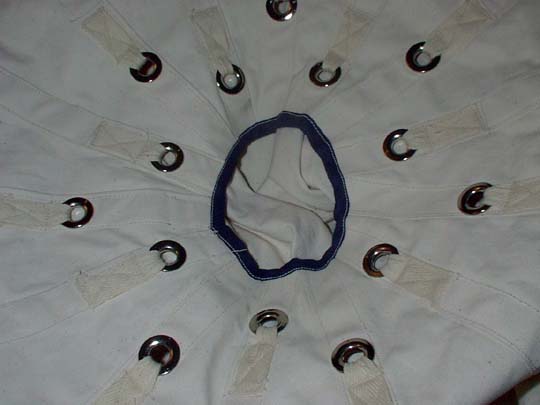
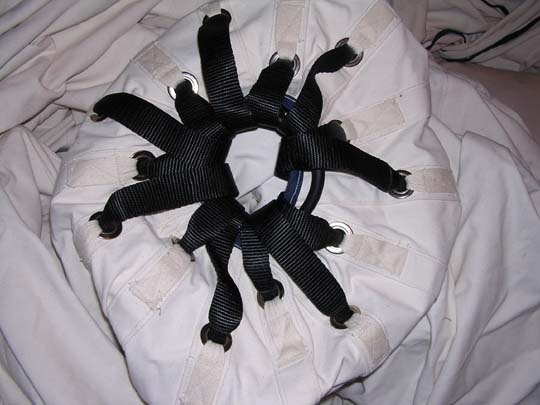 The ring strapped to the roof grommets Make the straps short enough to leave the fabric between grommets loose. |
 This cutaway view shows the ring strapped to the roof, and sitting atop the center pole. |
|
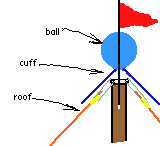
Why it works: A conical cuff covers the center hole and grommet holes to keep out rain, but we found that they still worked well as roof vents. They also allowed insects to escape instead of staying inside and accumulating at the peak; a definite plus! |
 |
 |
|
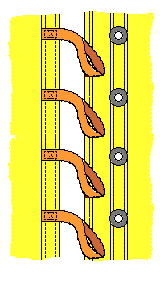
Why it works: A more common way to secure the spoke ends is to use fabric pockets, but attaching the pockets to the inside of the roof requires sewing through a lot of fabric. The fabric pockets also don't hold the roof and wall together. |
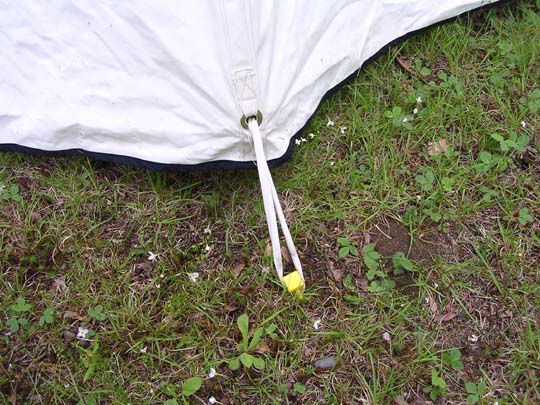 Each stake loop is tied to a toggle inside the tent |
|
| Why it works: This makes replacing worn out stake loops easy, and it's just as strong as all the other connection points on the tent. Adjustable loops also help in setting up the tent on irregular ground. |
| Why it works: Rolling a hem would mean sewing through a lot of folded-over seams. That's a tough job for most sewing machines. The folded tape allows raw edges to be covered over without a rolled hem. |
| Why it works: Sewing on the valence would mean having the valence seam cross the vertical seam between the roof panels, and would require sewing though a lot of fabric. |
Together, these features minimize sewing and maximize the strength of the pavilion. Any household sewing machine that can handle a flat-felled seam in canvas can be used, as there are no seams over seams. Stress in the pavilion is carried directly by the seams between the peak and the ground. Strap-reinforced spur grommets were tested in a seam of 10oz canvas, and supported 300lbs without tearing out.
Design and Construction:
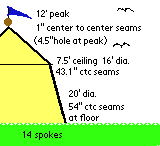
Decide what size you want your pavilion
to be, then calculate the size of roof and wall panels without
seam allowances. Make sure that the bottom of the roof panel is
the same width as the top of the wall panel. That all sounded
easy, didn't it? Honestly, this topic is covered so well in so
many different sources, that I hesitate to get into it here. Modify
these figures with the following allowances before making templates:
And here is the Easy, No-bake
part:
| This roof template was put together with wood strap and craft panel. Note that one edge of the template is against the edge of the fabric, and that the selvage has not been trimmed off. Do you like how we used our futon frame as a canvas dispenser? | 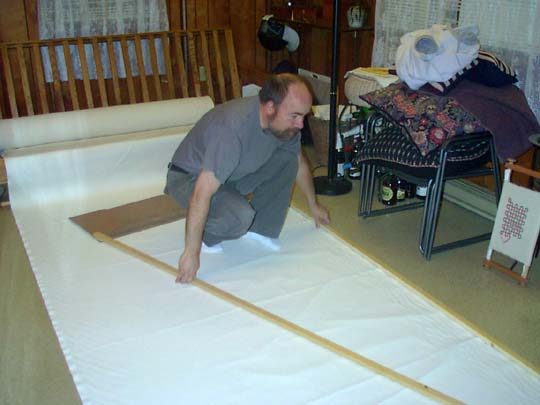 |
 |
 |
A note on door closures:
We attached a 6" privacy panel of canvas on the side of the door opening, and installed grommets all along the seam. We then attached corresponding loops of cotton webbing on the edge of the door panel. The loops are just long enough to reach the next loop and grommet. Once a loop has been passed through its grommet, it can be pulled to the next grommet so that the next loop will secure it. A knot in the last loop then keeps the line of stitched loops from falling open. It works the same whether the door is being secured from top or bottom, from inside the tent or out. I have never seen evidence which suggests that this method was used in a Medieval European tent, nor found a better way to hold a tent door closed.
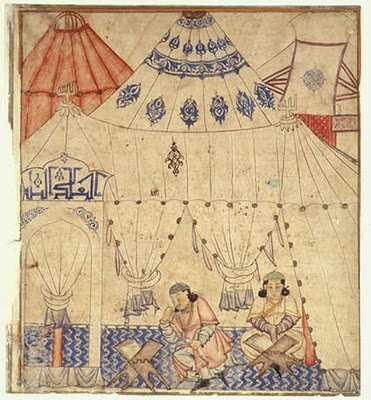 |  | |
| Mughal era painting showing the loops & grommets used for fastening tent openings. Diez album leaf probably from the Jami al Tavarikh of Rashid al-din. Ilkhanid, Tabriz, ca.1307. Staatsbibliothek zu Berlin. "Felt Tents & Pavillions," Peter Alford Andrews. With thanks to Mary Ostler for posting this image! | Loops are on the door's edge. We added a narrow privacy panel to the end of the wall, and mounted the grommets onto the resulting seam. |
A note on framework:
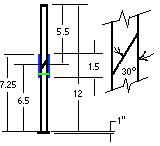
Beyond supporting the peak of the roof with the obvious center post, I have found three good ways to then support the walls of a pavilion: ropes, poles, and spokes. An extensive web of ropes can be used to hold the lower edge of the roof away from the center post, with the walls then hung from the roof. Although this was certainly the most common method in use during the Medieval period, it is not practical at most SCA events. There is faint argument that vertical poles or horizontal spokes may also have been used in period, but both work well to make the best use of limited camp space. Our pavilion can use either spokes or poles without changing anything else. It should also work well with ropes, but the neighbors certainly wouldn't like it. I didn't invent much of anything here, and so will not belabor the construction of the framework. If you use poles or spokes to support the walls, they will each need a 5/16" diameter metal pin sticking out of one end by about 4". Chamfer the top of the center pole so that the peak ring will center on it.
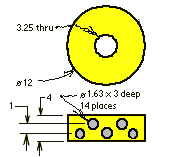
One of the earliest accounts of the hub and spoke design describes how the basic form of the hub was made by gluing together a stack of plywood disks. This was very likely done either for lack of better materials, lack of appropriate tools, or both. The hub so constructed promptly split apart during use, and was then put back together with a generous quantity of screws. It was plywood after all, and the wind-driven motion of the spokes quickly leveraged the veneer apart. With that cautionary tale in mind, the hub of the Taj Pavilion was constructed of solid ash.
Several methods of isolating the wind-driven motion of the spokes were considered, but the simplest ideas are often the best. Steeply taper the ends of each spoke so that it loosely fits the socket only at the opening, and it will then be free to move several degrees before it can even start to pry against the hub. Before doing this, our hub would entertain us during windy weather with the most unsettling groans. It now quietly rides out every storm.
A note on floors:
Our tent has no sod cloth to seal along the ground, and our canvas floor is kept dry by virtue of having no contact with the walls. We also use plastic floor liners to help keep the floor clean, and this has also kept the floor away from what little rain water has ever gotten in from under the wall during our worst weather.
A well pitched tent hugs the ground, and that has served to keep stray dogs and squirrels from entering under the wall. We live in New England, and so know nothing about having to keep pests from crawling into the tent at night.

Parts list:
This is what it took to build the 20' diameter
Taj Pavilion. Note that we bought more than we needed of everything;
sometimes out of prudence, and sometimes because we couldn't buy
exactly what what we were going to use. Some prices are approximate.
Specific sources are listed only for single-source or hard-to-find
items. The canvas was boat shrunk, flame retardant, water resistant,
and mildew resistant; well worth the price. Some prices are approximate.
Shipping costs are not shown.
Special Tools:
|
Set-up:
The Taj Pavilion has a spoked framework, but most of these directions will also apply to a pavilion with poles or ropes.
 |
 Distances between loops are determined by the radius of the floor, and the distance between stakes. |
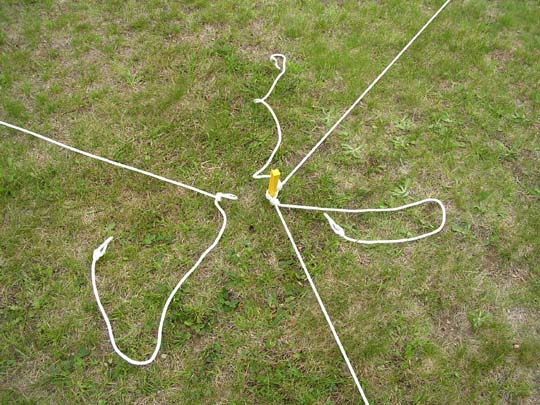 |
The distances between loops were for a 12' pole |


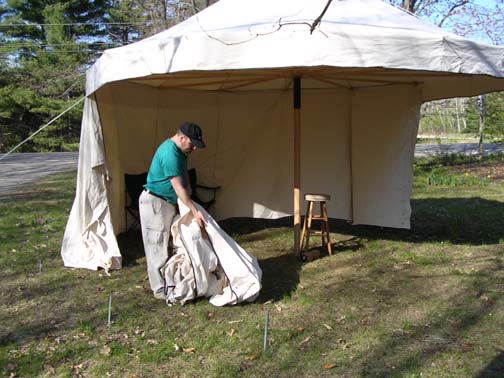
 Mickel picks from the "crossbow tree" Harper's Retreat VIII |
Links:
Dragonwing, the website of John LaTorre, a California tent maker, with articles on how to design and make pavilions.
Circa 1265, the website of Andy Goddard.
House Greydragon, the website of Peter Barclay and family.
Making a Medieval Single-Pole Pavilion, an article by David Kuijt, ska Dafydd ap Gwystl, webbed by Stephen Bloch, ska mar-Joshua ibn-Eleazar ha-Shalib.
The Kingdom of Atlantia, Arts and Sciences, look under "Arts and Science" for their "Pavilions and Tentmaking" links.
Medieval Pavilion Resources, website of Baroness Mira Silverlock.
Woodbutchery and Other Stuff, the website of Mary Ostler.
This page was created July 28, 2001. Last changed April 21, 2011.
Photographs and other content are copyright 2008 by John Wilson unless otherwise credited.
This web site was created and is maintained by John and Lee Wilson. Removeth not the back panel; there are no user serviceable bits therein.