Joiner's Three-Legged Chair
Adaptations of 16th Century examples


Turned Backstool
"Falling Between Two Stools"
Pieter Breughel the Younger


Joined Backstool

Rhine, circa 1551-1600, oak
Nurnberg Germanic National Museum


Camp Chair

A simple joined backstool
(Cat not included)

Medieval Turners Guilds "turned out" three-legged chairs by the zillions, and they would have been perfect for the household encampment except that every part requires the one piece of equipment which we do not yet have: a lathe! Then Mickel found the missing link; She noticed that a 3-legged chair recorded in the Nurnberg Germanic National Museum Archives had been built by a Joiner. There is not a lathe-turned part in it! I built a prototype in a couple hours with $20 worth of spruce and pine, and did everything on the tablesaw and the router. Our plan to build bench seating for the encampment was quickly revamped.

This web page was created to journal the day-by-day progress of this household project from prototype to completion.

Max


Click on the thumbnail pictures to view larger images.


Progress, March 26 2006

Only three days after Mickel had discovered the joined three-legged chair, our prototype (temporarily held together with a packing strap) is ready for folk to try. Nothing was done to make it pretty (like chamfering edges, slimming the upper part of the back leg, or carving the skirt panels to look like lattice-work); that can wait for the production version. Its features, size, and proportions were scaled from photographs of period turned chairs, as well as from the two available photographs of the joined three-legged chair. A seat-back-sized slat was simply held in place for folk to get an idea of where they would like to have a seat back.

I got the legs too heavy in section by cutting the hexagonal stock 3" across flats instead of 3" across corners. It makes the chair look a bit "tolkienish".

The seat pan just rests on top of the skirt panels, and nests inside the legs. As such, it can't be used to lift the chair, but otherwise stays in place quite well. I know it is evil to suggest something so entirely undocumentable, but with the skirt panels uncut like this, all it needs is a bottom panel to provide storage space under the seat . . .


Pile of Parts

We came up with a reasonable way to hold the chair together without glue, such that it could be broken down for travel. A two-piece seat pan would have allowed the entire chair to easily fit inside a kindling sack when it is broken down. The trick there would be to guard against it being used as firewood.

The Household tried and tested the prototype chair, discussed it at great length, and decided on a size slightly smaller than an office chair. The seat back will be fairly thick, and at a good height for resting elbows and drinking vessels. The legs will be made from slimmer stock than seen in the prototype. The skirt panels will be left plain at this time, as some folk may decide that they want to keep the under-the-seat storage space.


 Progress, March 30 2006

Jamin, Iain, and I worked for several hours on Wednesday evening, and cut 80 feet of hexagonal stock from 4x4 lumber to use for legs. Iain & I then worked five hours on Thursday, and cut out legs, backs, and skirt panels for the first eight chairs, and finished much of the joinery.


  Progress, April 1 2006

I spent a little time on the project today, and finished more of the joinery. The photo here shows all of the parts held together just by their natural inclination. Seat pans have not been cut out yet; the one shown here is from the prototype chair, and therefore does not fit well.

The narrower legs are a big improvement to the appearance of the chair. The plain skirt panels make the chair look bulky, but carving them to look like lattice-work should fix that.


 Progress, April 5 2006

We got a respectable amount of work done this evening. Mostly it was Adrienne sanding, Gen drilling and counterboring legs, and Jamin cutting out seats on the table saw. There is still work to be done on the seats, but most everything else is finished!


  Progress, April 7 2006

Gen finished the legs and Josh completed the last cuts on the skirt panels while Iain and Jamin wrestled with how best to make the seats. Most of the seat parts are roughed out, but there is still much work to be done on them. The seat from the prototype chair was used in evaluating the first assembled production chair.


Rope Harness

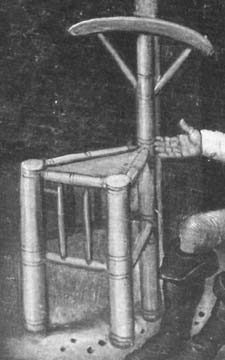
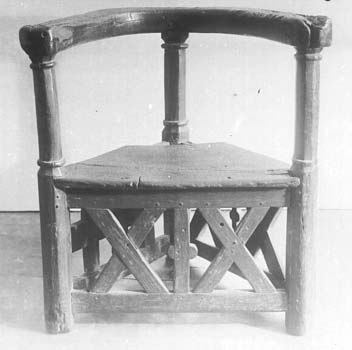
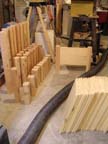
Although the examples which we have found of period three-legged chairs are all permanently assembled, we had to adapt the design so that the chairs could be broken down for travel to our encampments. 
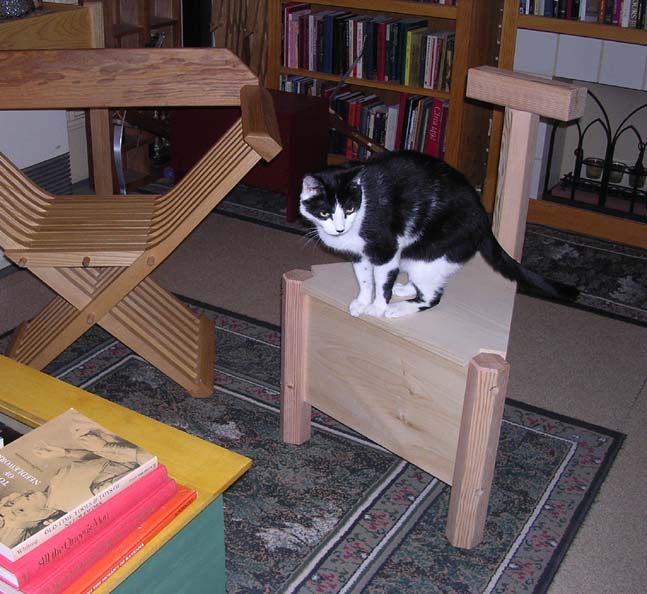
A packing strap around the outside of the legs had worked well to hold the prototype chair together, and so we came up with a scheme to use ropes hidden under the seat to do the same thing. This we eagerly tried out the moment we had a complete set of legs and skirt panels!

Although using ropes in this manner is undocumented, modern, and they were going to be hidden anyway, we still wanted to use materials that at least appeared to be period. We therefore made the first harness using a synthetic rope which has the looks of a natural fibre. Unfortunately, this rope behaves poorly and could not be tensioned adequately. We then used a braided nylon rope which worked fabulously. The chair held together well with little creaking, and the back can be leaned on comfortably without the joints opening up. Tipping the chair back on one leg might be a bad idea, but then when is it not? The harness is fairly straight-forward to tie, but unfortunately uses up much of the under-the-seat space which might have otherwise been used as storage. We might play with this further therefore, but the important thing is that we already have at least one good solution.

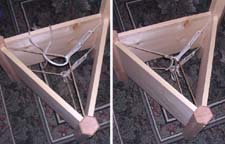
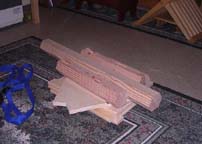
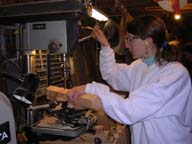
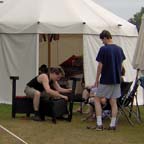
The first photograph shows the first stage in assembling the rope harness. A rope connecting the two front legs (brown) is pulled into the center by a rope from the third (white). Wrapping the second rope back through a loop helps to apply a moderate amount of tension. This is repeated near the top and bottom of the skirt.

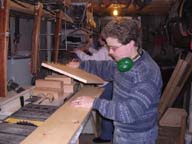
The second photograph shows how the harness is fully tensioned by wrapping the loose end of one rope several times about the centers of the upper and lower pairs, and using it to pull them together. The harness is hard when properly tensioned, and will produce a note when plucked.

 Progress, April 9 2006

I finished a seat to complete the first chair. This seat is one-piece, but there has been much discussion over making two-piece seats to reduce the size of the chair when broken down for travel. A leather hinge could be used to hold the two parts together, and allow them to fold to the same width as the skirt panels.

The chair is rough sanded and the skirt panels are plain. How the chairs will be detailed and finished is up to each household member. Mickel & I intend to carve the panels on our chairs to look like the lattice-work seen on the joiner's chair in the Nurnberg Museum, and then paint them in a period color and texture.


 Progress, April 10 2006

Gen & I completed the rest of the seats. We've decided to eventually complete the prototype chair (formerly destined as firewood), as there is nothing wrong with it structurally. All of the changes made for the production chairs were aesthetic, and were fairly minor at that.

 Progress, April 20 2006

Jamin, Josh, Gen, Iain, and I finished such details as gluing on the back rests and chamfering seat edges. We then made rope harnesses and assembled all eight chairs! The seats were done as two pieces so that the chairs would pack smaller, but the parts can be joined together to make one-piece seats for those who want them.

Once the chairs have passed inspection, they will be sold to household members. Orders are filled at random, so everyone involved had to be satisfied with every chair before any were sold. The price was based entirely on the cost of materials, which came out to $30 per chair.

It has been a fun project so far, and it took less than a month to reach this stage. Lately there has been a lot of talk in the shop regarding how each person wants to paint, oil, carve, or otherwise decorate their own chair. I look forward to posting photographs of at least a few of these when they are finished!

 Afterwards, March 21 2009

Many of the chairs, even the prototype, have by now seen several years of use. They have held up well, are quite popular, and have even been copied by others. They have come to be known locally as the Haus Wanderstamm Sobriety Test, although they could hardly be more stable.

Jamin and Noelle first stained their chairs black, and cut trefoil openings in the side panels. They looked great in the daytime, but were hazards to navigation at night! They have since been repainted in friendlier colors, and have been given coordinating triangular cushions. Josh and Gen used milk paint on the side panels and seats of their two chairs, then varnished everything.

Perhaps someone may yet carve side panels to mimic the joined backstool which started us down this path. Take a good look at that chair at the top of this page; the three panels were done in two distinctly different styles!


Bibliography:

Furniture and Interior Decoration of the Italian Renaissance, by Frida Schottmuller, New York Brentano's, 1921


Webliography:

Medieval and Renaissance Woodworking, by Gary R. Halstead, 1999 - 2004

Marburg Picture Archives (Bildindex!), Philipps University of Marburg


Home - Recent events - Sea kayaking and canoeing - The DisSonatas - Crafts

Fencing in Southern Maine - Our SCA personae - Auction offerings

Contact us


Photographs and other content are copyright 2006 by John Wilson unless otherwise credited.

This web site was created and is maintained by John and Lee Wilson. Removeth not the back panel; there are no user serviceable bits therein.